Today’s post is all about how I make milk jug greenhouses and start my seeds.
When you are searching for ways to start your seeds for the season, many people are not sure how, or even where to start.
In my inbox I have been getting a lot of questions on how to start seeds from users. Today, I will show you one way.
For a few, I tried to explain the process of starting seeds in milk jug greenhouses. This is what I did before I had my mini greenhouse.
Decided to write up a blog post to share with everyone.
Collect Milk Jugs
Throughout the winter I would collect my milk jugs and wash them out thoroughly. When I was ready to plant, I would start cutting the greenhouses.

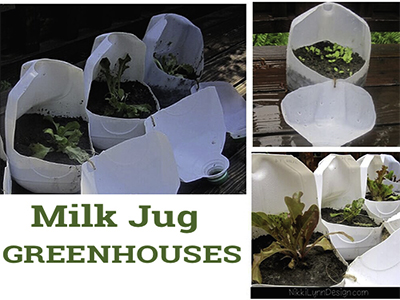
Steps To Make Milk Jug Greenhouses
1.) Wash out your milk jugs thoroughly.
2.) Cut the greenhouse door flaps. The easiest way to do this is to poke a hole in the carton and then use scissors to cut the door.
3.) Hole punch the door and base portion of the milk jug (see top right picture) to string.
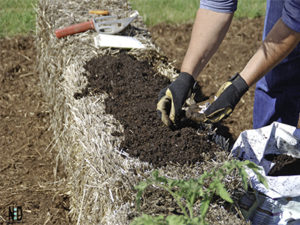
4.) Fill the milk jugs with any potting soil mix. I don’t use anything special. Just regular, old potting soil.
5.) I water the potting soil well before planting my seeds.
6.) Plant seeds according to package instructions.
7.) Close door flap.
8.) Set your mini greenhouses on top of your refrigerator. You don’t need a lot of sunlight for your seeds to sprout. The warmth on top of your refrigerator helps your seeds sprout quickly.
9.) Keep soil damp but not wet. I have found a spray bottle works best. Pouring water directly on top of the seedlings can damage their stems.
10.) When the seedling are about 1″ – 1 1/2″ long place the milk jugs in a sunny window. Continue to keep your window flap closed. Keep your soil damp, but not wet.
11.) When the plants reach 2-1/2 inches tall, keep the door flap slightly cracked open a few days to acclimate the seedling to cooler weather.
12.) After three days with the door flap cracked open, remove the door completely.
13.) Continue to water the seedlings until you are ready to plant outdoors.
14.) When ready to plant outdoors, I suggest acclimation your plants to the elements before planting directly outdoors. You can slowly get your plants ready for planting by bring them outside for an hour or two a day. Bring them back indoors after its short stay. Continue building up time outside over a two-week period of time. Then plant outdoors.
Using the milk jug system is cheap, easy and they are portable. I also like making newspaper pots.
Before I used my mini greenhouse I would put the pots inside a shallow dish and cover them with plastic bags.
Hope this helps you out my friends!