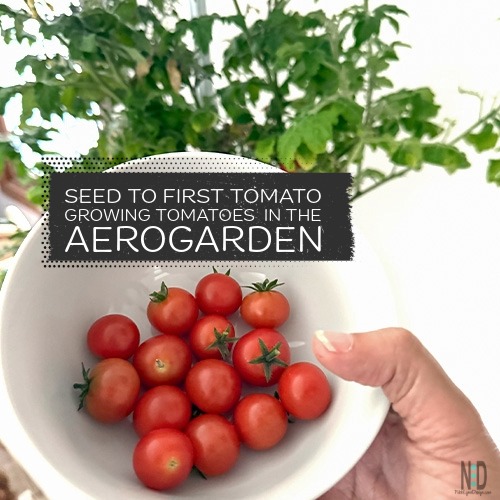
AeroGarden Tomatoes: Tiny Tim + San Marzano (My Indoor-to-Outdoor Grow)
This year’s AeroGarden tomato adventure kicked off on March 22nd, with both Tiny Tim and San Marzano seeds getting their start in the setup—two different yet equally exciting varieties that promised a mix of indoor charm and outdoor potential.
And if you’ve ever dealt with classic tomato problems later in the season (hello, leaf yellowing or mystery spots), I’ve got a few helpful related guides linked throughout this post—especially my growing issues with tomatoes and tomato watering tips.
What I Grew (Quick Overview)
- Tiny Tim: compact dwarf tomatoes that do great indoors (perfect for AeroGarden ends).
- San Marzano: sauce-style tomatoes that start indoors and transition outdoors later.
First Step Is to Sanitize
It doesn’t matter if the AeroGarden is fresh out of the box or was used the previous year. You should always sanitize the pieces.
Before diving into the planting, I always like to start with a fresh, clean slate for my AeroGarden to give those seeds the best possible beginning. Here’s how I handle the setup: First, I disassemble the pieces carefully—taking apart the grow deck, pods, and any removable parts while making sure to keep the motor and electrical components out of the mix, as they’re not dishwasher-safe. I pop the rest into the dishwasher on a hot cycle for a thorough sanitize, which helps eliminate any lingering bacteria or residue from previous grows.
Helpful to have: For quick between-season cleanups, I keep food-grade hydrogen peroxide on hand and a small cleaning brush set for the tight corners around pods and tubing.
It’s a simple step that brings me peace of mind, especially when I’m working with something as rewarding as homegrown tomatoes.
It Is Planting Time
Once everything’s dry and reassembled, I reach for the AeroGarden 9 Pod Kit, which I picked up earlier this year for its reliable performance and roomy design—perfect for experimenting with multiple varieties at once.
If you’re thinking of starting your own setup, you can find the general AeroGarden here: AeroGarden, and the 9 Pod Kit specifically here: AeroGarden 9 Pod Kit. If you purchase from these links, I’ll earn a small commission at no extra cost to you, which helps keep these gardening tales coming.
Optional (but handy): I also like having replacement grow sponges and AeroGarden nutrients ready to go—especially if I decide to restart a pod or refresh the system mid-season.
Planting the seeds is where the real magic begins.
More on My Seed Choices
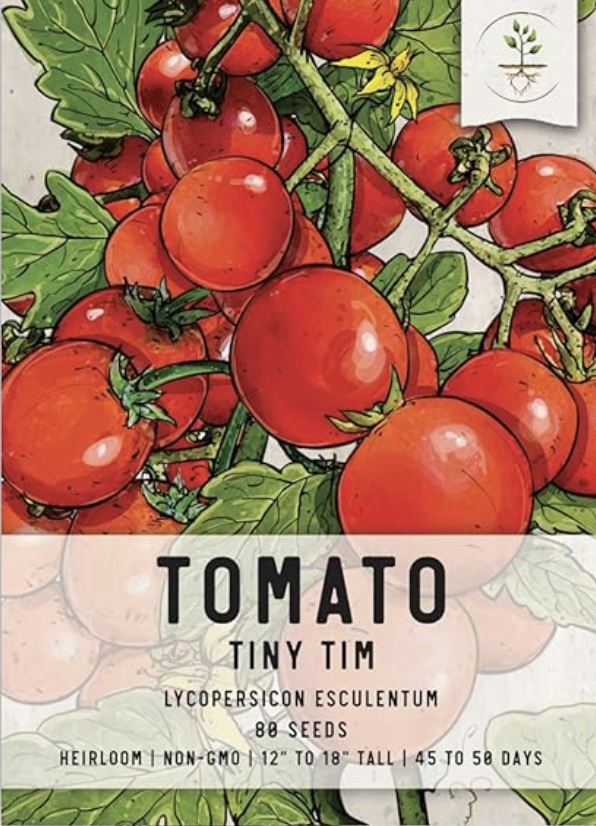
Tiny Tim for Indoors
Tiny Tim tomato plants are a perfect fit for the ends of the AeroGarden, thanks to their compact, dwarf growth habit that keeps them neat and contained.
I start by sowing three seeds in each pod to increase the odds of strong germination, then thin them down to just the heartiest seedling in each one, giving it plenty of space to grow without competition.
These cherry-sized tomatoes are ideal for fresh snacking and thrive indoors, making them a go-to for anyone with limited room.
If you’re looking for a reliable heirloom variety, these are the Tiny Tim seeds I used this season.
Tip: When I thin seedlings, I snip extras at the base instead of pulling them. A small pair of micro pruning scissors makes it quick and clean.
If you decide to purchase from any link on this page, I’ll earn a small commission at no extra cost to you—it’s a little way to support more gardening stories like this one.

San Marzano for Outdoors
At the same time, I’m starting San Marzano seeds in the AeroGarden, noting how their elongated shape resembles Roma tomatoes—they’ll get their big break outdoors later.
Gardeners love these Italian heirlooms for their rich, sweet flavor, and I use them for sauces.
Once established, I plan to transfer them into pots where they can spread out and soak up the sun, drawing on their rich flavor and low moisture content to create flavorful homemade tomato sauce that elevates simple meals into something special. (If you like making sauces, you might also love my tomato paste recipe.)
I planted these San Marzano seeds this season and found them to be a reliable heirloom variety.
Outdoor setup I like: Once they head outside, I use these 10-gallon grow bags and trellis to keep the plants supported as they load up with fruit.
April 4th – Day 13: Visible Seedling of Both Varieties
On the morning of April 4th, the 13th day since planting, every pod had visible seedlings — though judging by their size, sprouting may have happened as early as day 10.
I also started a second AeroGarden to plant romaine lettuce, which will remain indoors for a fresh, year-round harvest.
May 25th – Day 51: First Blossoms – Tiny Tim Tomato Plants
On May 25th, the Tiny Tim tomato plants showed off their first cheerful yellow blooms — a sure sign that fruit isn’t far behind.
These compact, container-friendly plants may be small in stature, but their blossoms promise a season full of sweet, homegrown tomatoes.
May 27th – Day 53: Planted San Marzano Outdoors
By March 26th, the San Marzano were more than ready to be transplanted outside. The seeds grew steadily in the AeroGarden before their move outdoors. I don’t have a picture or video because I may have planted them at 11:30 at night due to work/life balance. But they are happy to be under the summer skies.
As the project unfolded, it was rewarding to see how the AeroGarden nurtured them initially, setting the stage for their outdoor success.
Tomato care note: Outdoor tomatoes can run into problems fast if watering is inconsistent. If you’ve ever dealt with blossom end rot or dark spots on the bottom of tomatoes, this post might help: tomatoes have dark spots on bottom (blossom end rot). And here are my best tomato watering tips.
July 9th – Day 109: Tiny Tim Tomatoes in Full Swing
By July 9th, the Tiny Tims were in full swing—weighted down with green and ripened red tomatoes, with the first harvests already adding a fresh burst to my everyday meals. Their dense root systems kept things lively, demanding daily water top-offs, leading to more frequent nutrient applications. The yellowing leaves were a subtle sign that these pint-sized powerhouses have quite the appetite during fruiting season, teaching me to fine-tune care with a watchful eye and gentle adjustments.
If you ever run into issues like curled leaves, yellowing, or slow fruiting, here’s my troubleshooting post: growing issues with tomatoes. And if pests show up, this guide is helpful: tomato pests.
July 21st – Harvested the First Ripe San Marzano

I finally harvested my first San Marzano! Well… my first. Truth is, I haven’t exactly been watering the outdoor tomatoes, and our dogs probably enjoyed the real first ripe ones before I knew they existed.
This year has been all work, rinse, repeat — with barely a scrap of free time. But hey, no complaints. If you want to reach your goals, you’ve got to work toward them… even if your competition is the family dog.
Watching both varieties thrive has been deeply rewarding, proving that with a little care (and a lot of enthusiasm), the AeroGarden can bring the full tomato experience to life — from sweet, snackable Tiny Tims to rich, saucy San Marzanos — right at my fingertips.
What I Made with the Harvest
If your tomatoes make it inside the house before the dogs do, here are two of my favorite ways to use them: tomato paste and tomato basil mozzarella skewers.
AFFILIATE POLICY: Posts on this site may contain affiliate links. If you purchase through those links, I may earn a small commission at no additional cost to you. Thank you for supporting my work.