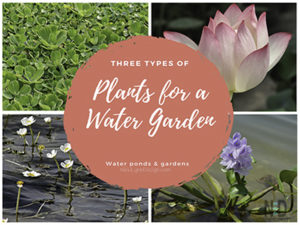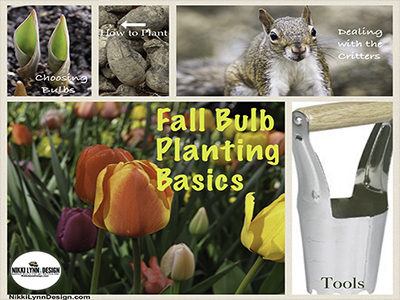
Fall Bulb Planting Basics for Spring Flowers
Planting your spring flowering bulbs in fall can be a risky business. You are not guaranteed to a have a beautiful blossoming flower garden come spring.
Follow my Fall Bulb Planting Basics and I can give you every confidence in your ability to succeed.
Selecting Your Bulbs
Hold the Bulbs in Your Hand
I’m a person that likes to see and hold my bulbs in my hand. So, ordering my bulbs from an online source is out of the question for me.
Key Things To Look For
1.) When holding a bulb in your hand, you should look for bulbs that are on the heavier side. If the bulb has dried up, pass on them. They will not grow.
2.) The outside of the bulb should be free of mold, if there is a little surface mold that can be wiped clean with your hand, that is ok. The inside of the bulb will not have been damaged.

3.) If the bulb is soft, pass on it.
4.) Look for packaging that states “top size”, this means a larger bulb and usually means bigger, healthier flowers.

Planting Fall Flowering Bulbs
1.) As a general rule of thumb bulbs should be planted 3 times the bulbs height deep. In heavy clay soils you will need to go shallower, In light sandy soil, deeper.
In regions that do not receive harsh frost or snow, it is not important to plant as deep.
2.) To plant bulbs you can purchase a bulb planting tool to dig your hole. I have found that my husbands drill with a very large, auger-type drill bit works better for me and saves me time.

How you decide to tackle the digging portion is up to you.
3.) After your hole has been dug you will want to add fertilizer to the bottom of the hole to feed the bulb. It is important not to lay your bulb directly onto the fresh bed of fertilizer. Add a little dirt over the fertilizer to keep your bulb from getting burnt.
Which Side of the Bulb Do You Plant Up?
Which side of the bulb is planted upright is the most common question asked. I have most certainly learned this tip from trial and error.
If you look at the bulb below you will see the bulb comes to a point.

The pointed side is planted upright, toward the sky. The roots grow from the flat area on the bottom of the bulb. The roots are not always growing off the bottom – so, it is NOT a no brainer.

How to Keep the Critters From Digging Up Your Bulbs
After placing the bulb into the hole, place dirt on top to cover. Place a piece of hardware cloth over the dirt and then mulch on top. This keeps the squirrels from digging up the bulbs before the ground freezes.
Believe me – the squirrels just wait. When you turn your back, they WILL dig up your bulbs without that hardware cloth.
In the Spring
In the spring, after the snow melts I go and remove the hardware cloth so the plant can emerge from the soil.

I can’t wait to see my carpet of new coloring in the Spring! Hope you found some use in this article fall bulb planting basics.
Happy planting!!